Controlling LED Using Nodemcu From Firebase

Hi everyone, in this tutorial we are going to learn on how to control an LED attached to Nodemcu pin by using Google Firebase. This project enable us to control the LED from anywhere around the world as long as there is internet connection for this project to run. Actually there are numerous of IOT platform clouds to achieve the goal of this project but we will be using Google Firebase console specifically for this project.


Firebase is Google’s database platform which is used to create, manage and modify data generated from any android application, web services, sensors etc. For more information on Firebase please visit the official website of Google Firebase.
Setting Up NodeMCU ESP8266 Wi-Fi Module
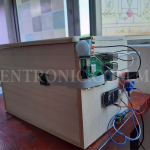
This step is very simple and does not require much time. All you need to do is setting up the connection as follows.

If this is your first time using Nodemcu, please refer to this link to install Nodemcu board into Arduino IDE Software.
Programming NodeMCU ESP8266 to Connect to Google Firebase
This project needs 2 library files which can be downloaded from these links below.
https://github.com/FirebaseExtended/firebase-arduino/blob/master/src/Firebase.h
http://downloads.arduino.cc/libraries/github.com/bblanchon/ArduinoJson-5.13.1.zip
The complete code for this project will be given at the end of this tutorial. Here we are explaining few important parts of the code. Firstly include the libraries for using ESP8266 and Firebase library.
#include <ESP8266WiFi.h
#include <FirebaseArduino.h
Secondly, these two parameters are very important to communicate with firebase. Setting these parameters will enable the data exchange between and ESP8266 and firebase. To find these parameters please refer to next part of this tutorial.
#define FIREBASE_HOST "your-project.firebaseio.com"// the project name address from firebase id
#define FIREBASE_AUTH "06dEpqanFg***************qAwnQLwLI"// the secret key generated from firebase
Next, these parameters are used to connect to your home Wi-Fi network or the network that you setup. Replace SSID and password with your network SSID and password. Make sure you have internet connection in order to communicate with firebase.
#define WIFI_SSID "xxxxxxxxxxxxx"// input your home or public wifi name
#define WIFI_PASSWORD "xxxxxxxxxxxxxx" //password of wifi ssid
Setting Up Firebase Console
1- Go to https://firebase.google.com/ and register your account. After completing the registration, click ‘Add Project‘.

2- Name your project and click ‘Create Project‘.

3- After creating the project, go to Project Setting>Service Account>Database Secrets and copy the database secret and keep it for later use.

4- Go to Database tab and click Create Database and make sure the database to be in test mode


5- Once the database created, copy the database link as shown in the picture below and keep the link

6- Now you already have the secret code and the database link to connect your project to Firebase server. Paste both of the parameter into the code of this project. Refer to the picture below

The Code
/* Controlling LED using Firebase console by zentronic */
#include <ESP8266WiFi.h>                                                // esp8266 library
#include <FirebaseArduino.h>                                             // firebase library

#define FIREBASE_HOST "led-control-c6d7c.firebaseio.com"                         // the project name address from firebase id
#define FIREBASE_AUTH "0HTxkP7OdCBJH0jOVHsO2txcVTPGcKiOXXW09qKM"                    // the secret key generated from firebase
#define WIFI_SSID "Rumah_Saya@unifi"                                          // input your home or public wifi name
#define WIFI_PASSWORD "1a2b3c4d5e"                                    //password of wifi ssid

String fireStatus = "";                                                     // led status received from firebase
int led = D3;                                                                // for external led
void setup() {
  Serial.begin(9600);
  delay(1000);
  pinMode(LED_BUILTIN, OUTPUT);
  pinMode(led, OUTPUT);
  WiFi.begin(WIFI_SSID, WIFI_PASSWORD);                                      //try to connect with wifi
  Serial.print("Connecting to ");
  Serial.print(WIFI_SSID);
  while (WiFi.status() != WL_CONNECTED) {
    Serial.print(".");
    delay(500);
  }
  Serial.println();
  Serial.print("Connected to ");
  Serial.println(WIFI_SSID);
  Serial.print("IP Address is : ");
  Serial.println(WiFi.localIP());                                                      //print local IP address
  Firebase.begin(FIREBASE_HOST, FIREBASE_AUTH);                                       // connect to firebase
  Firebase.setString("LED_STATUS", "OFF");                                          //send initial string of led status
}

void loop() {
  fireStatus = Firebase.getString("LED_STATUS");                                      // get ld status input from firebase
  if (fireStatus == "ON") {                                                          // compare the input of led status received from firebase
    Serial.println("Led Turned ON");
    digitalWrite(LED_BUILTIN, LOW);                                                  // make bultin led ON
    digitalWrite(led, HIGH);                                                         // make external led ON
  }
  else if (fireStatus == "OFF") {                                                  // compare the input of led status received from firebase
    Serial.println("Led Turned OFF");
    digitalWrite(LED_BUILTIN, HIGH);                                               // make bultin led OFF
    digitalWrite(led, LOW);                                                         // make external led OFF
  }
  else {
    Serial.println("Wrong Credential! Please send ON/OFF");
  }
}
After uploading the code into Nodemcu board, open the database and look at the ‘Led_Status‘ String inside the database. If you can’t notice the string, press the reset button on the Nodemcu. Now you can control the led by changing the string to ON or OFF.